May 13, 2026
How to Make an Animated iPhone Mockup Video for Instagram Reels
If you want to promote an app on Instagram, a flat screenshot isn't going to do much work for you. What performs on Reels is motion — a phone rotating into frame, your app playing on the screen, the kind of visual that makes someone pause mid-scroll and wonder how you made it. This guide covers exactly how to make an animated iPhone mockup video for Instagram Reels, from the screen recording on your device to the finished 9:16 video in your camera roll. No 3D software. No desktop. No designer.
Why Animated Mockups Outperform Static Screenshots on Reels
Instagram's Reels feed is engineered for motion. Static images do appear there, but they compete against video content that autoplays the moment it enters the viewport. When your ad or organic post is a still image surrounded by moving content, it reads as inert — and inert gets skipped.
An animated mockup changes the equation in a few specific ways.
First, motion captures peripheral attention. Even someone not directly looking at your post registers movement and redirects. A rotating 3D iPhone is movement. A flat PNG is not.
Second, depth signals quality. A 3D phone with realistic lighting and screen reflections looks expensive. It signals that the product behind it is worth taking seriously. The same app screenshot in a flat device frame looks like a template. The gap in perceived quality is significant — and it costs nothing extra to close it.
Third, animation lets you show the app in context. A video with your app actually playing inside the iPhone screen tells the viewer: this is a real product, this is what it looks like to use it, here's the part you'll care about. Static screenshots require the viewer to imagine all of that. Video hands it to them.
What You Need Before You Open Anything
Three things, and that's genuinely it.
A screen recording of your app's core flow. Keep it to the most compelling 15 to 20 seconds — the moment a new user would experience value for the first time. If your app has a beautiful onboarding, start there. If the main screen is the thing, go straight to it. Don't record a full walkthrough; record a highlight.
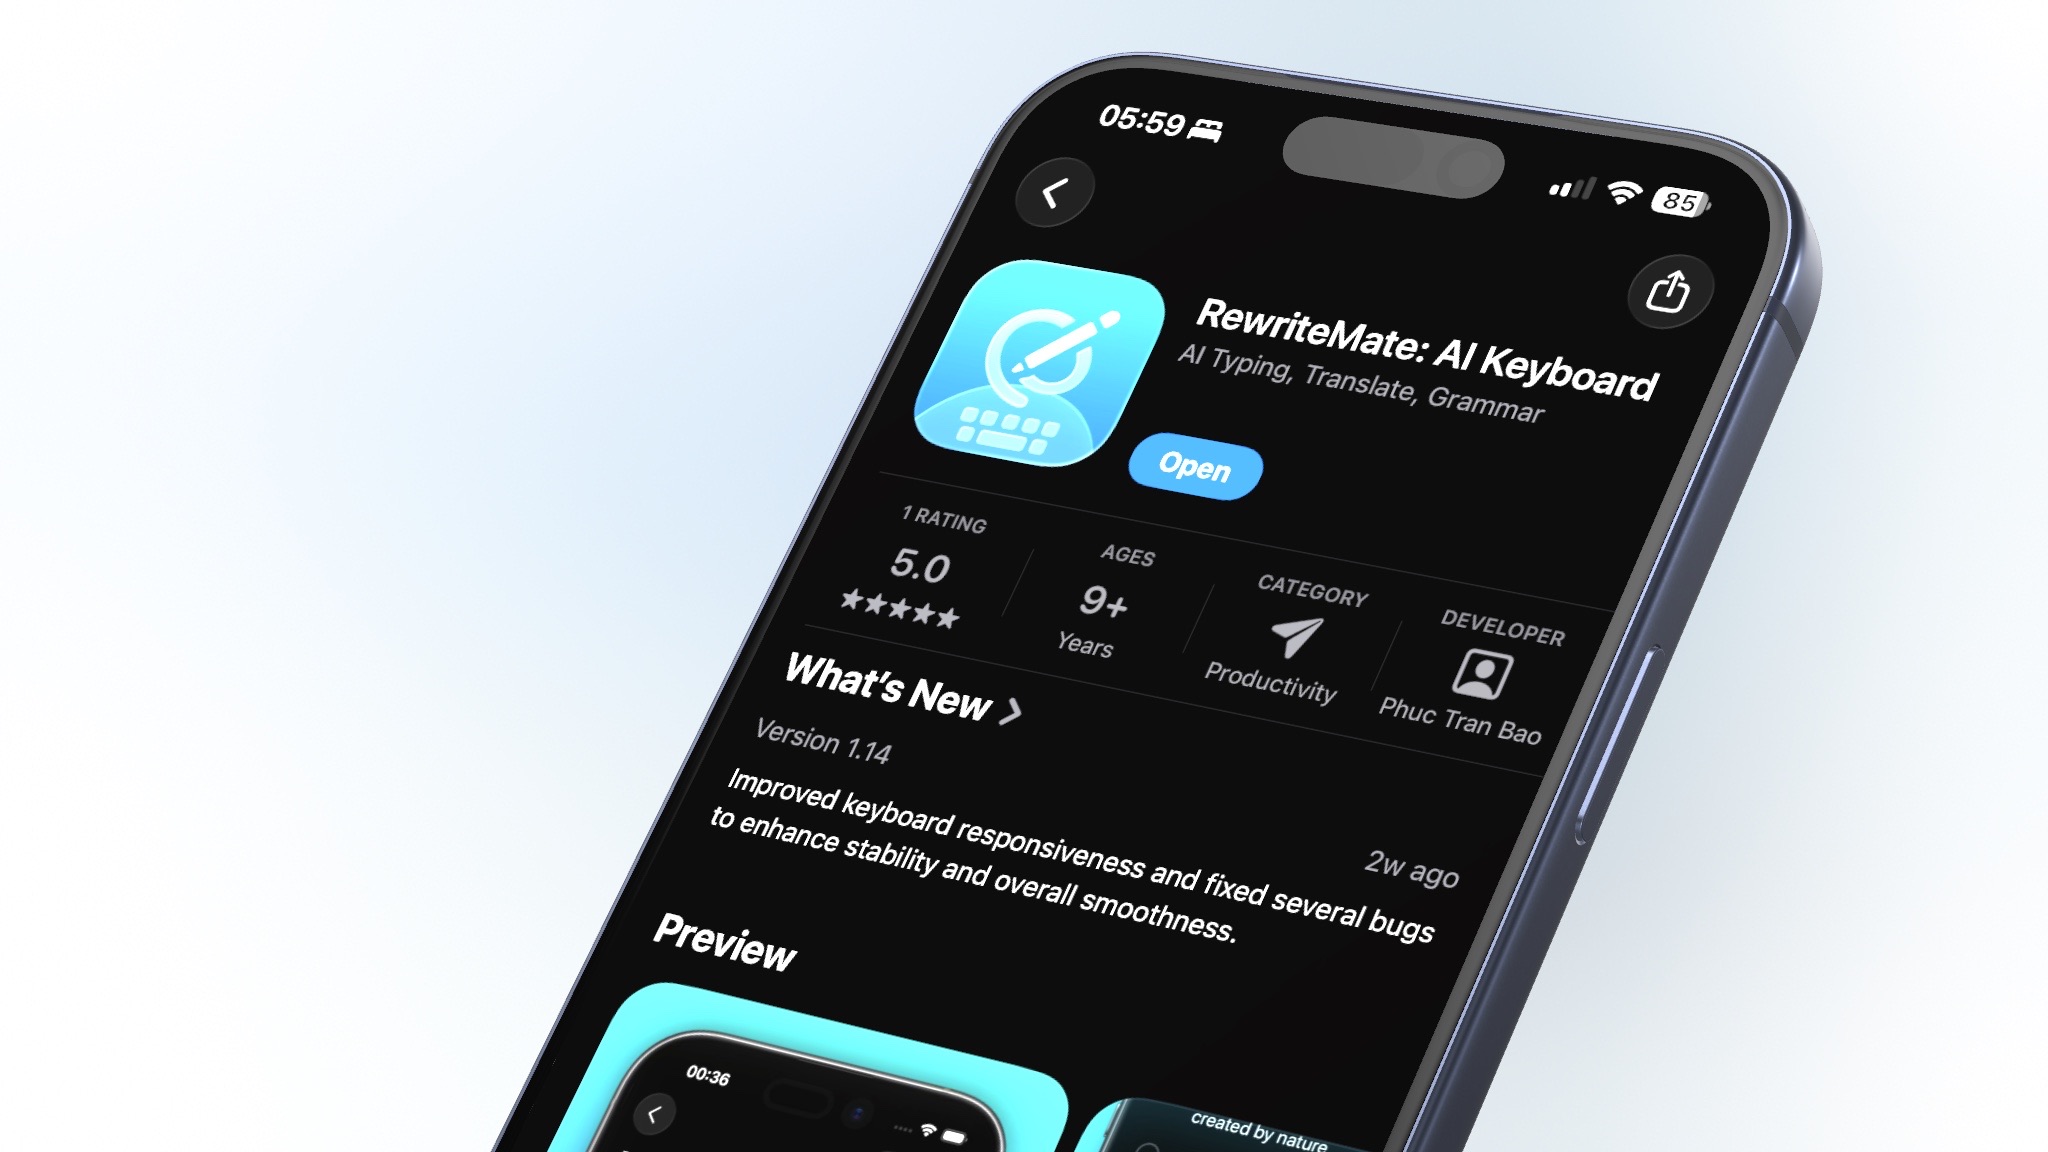
Protato installed on your device. It's free to get started — you get export credits to try the complete workflow before deciding on a plan. Download it from the App Store and open a new project.
A clear frame for the video. Decide before you start: what should the viewer understand by the end of the first three seconds? "This app is beautiful." "This tool is fast." "This is the app for people who do X." One idea, stated visually. Everything else in the post supports that.
Step 1 — Choose Your iPhone Model and Import Your Recording
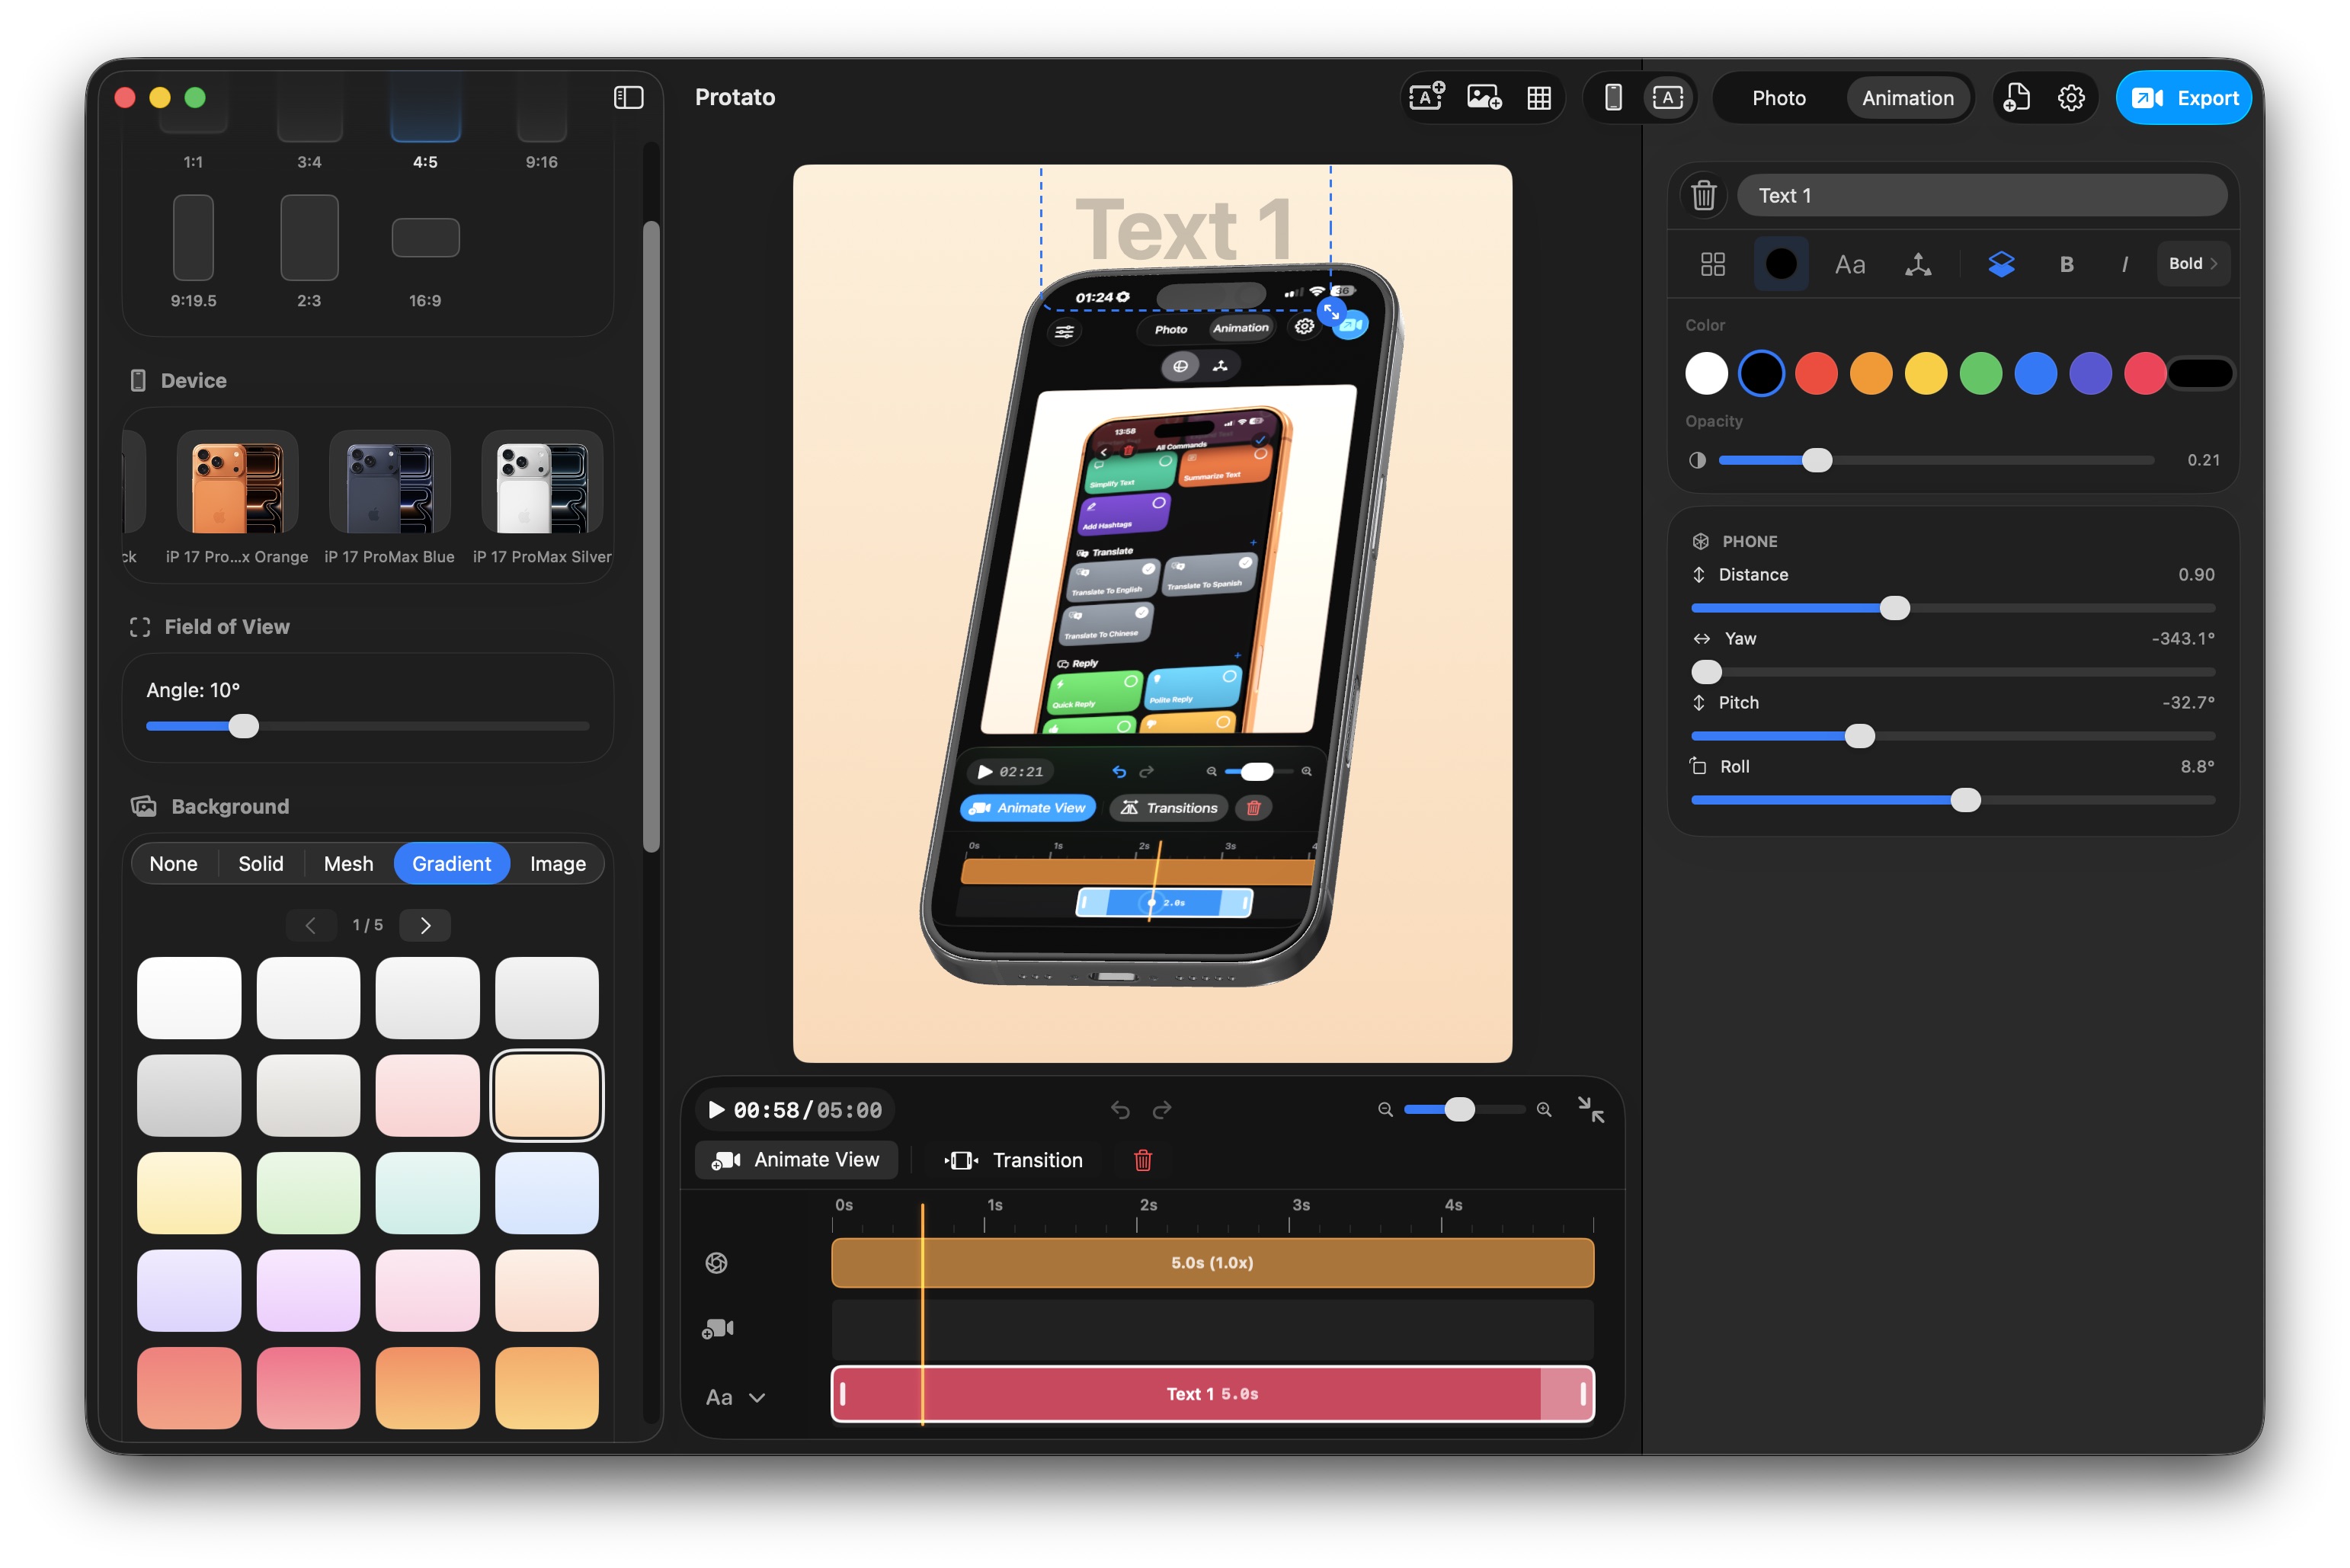
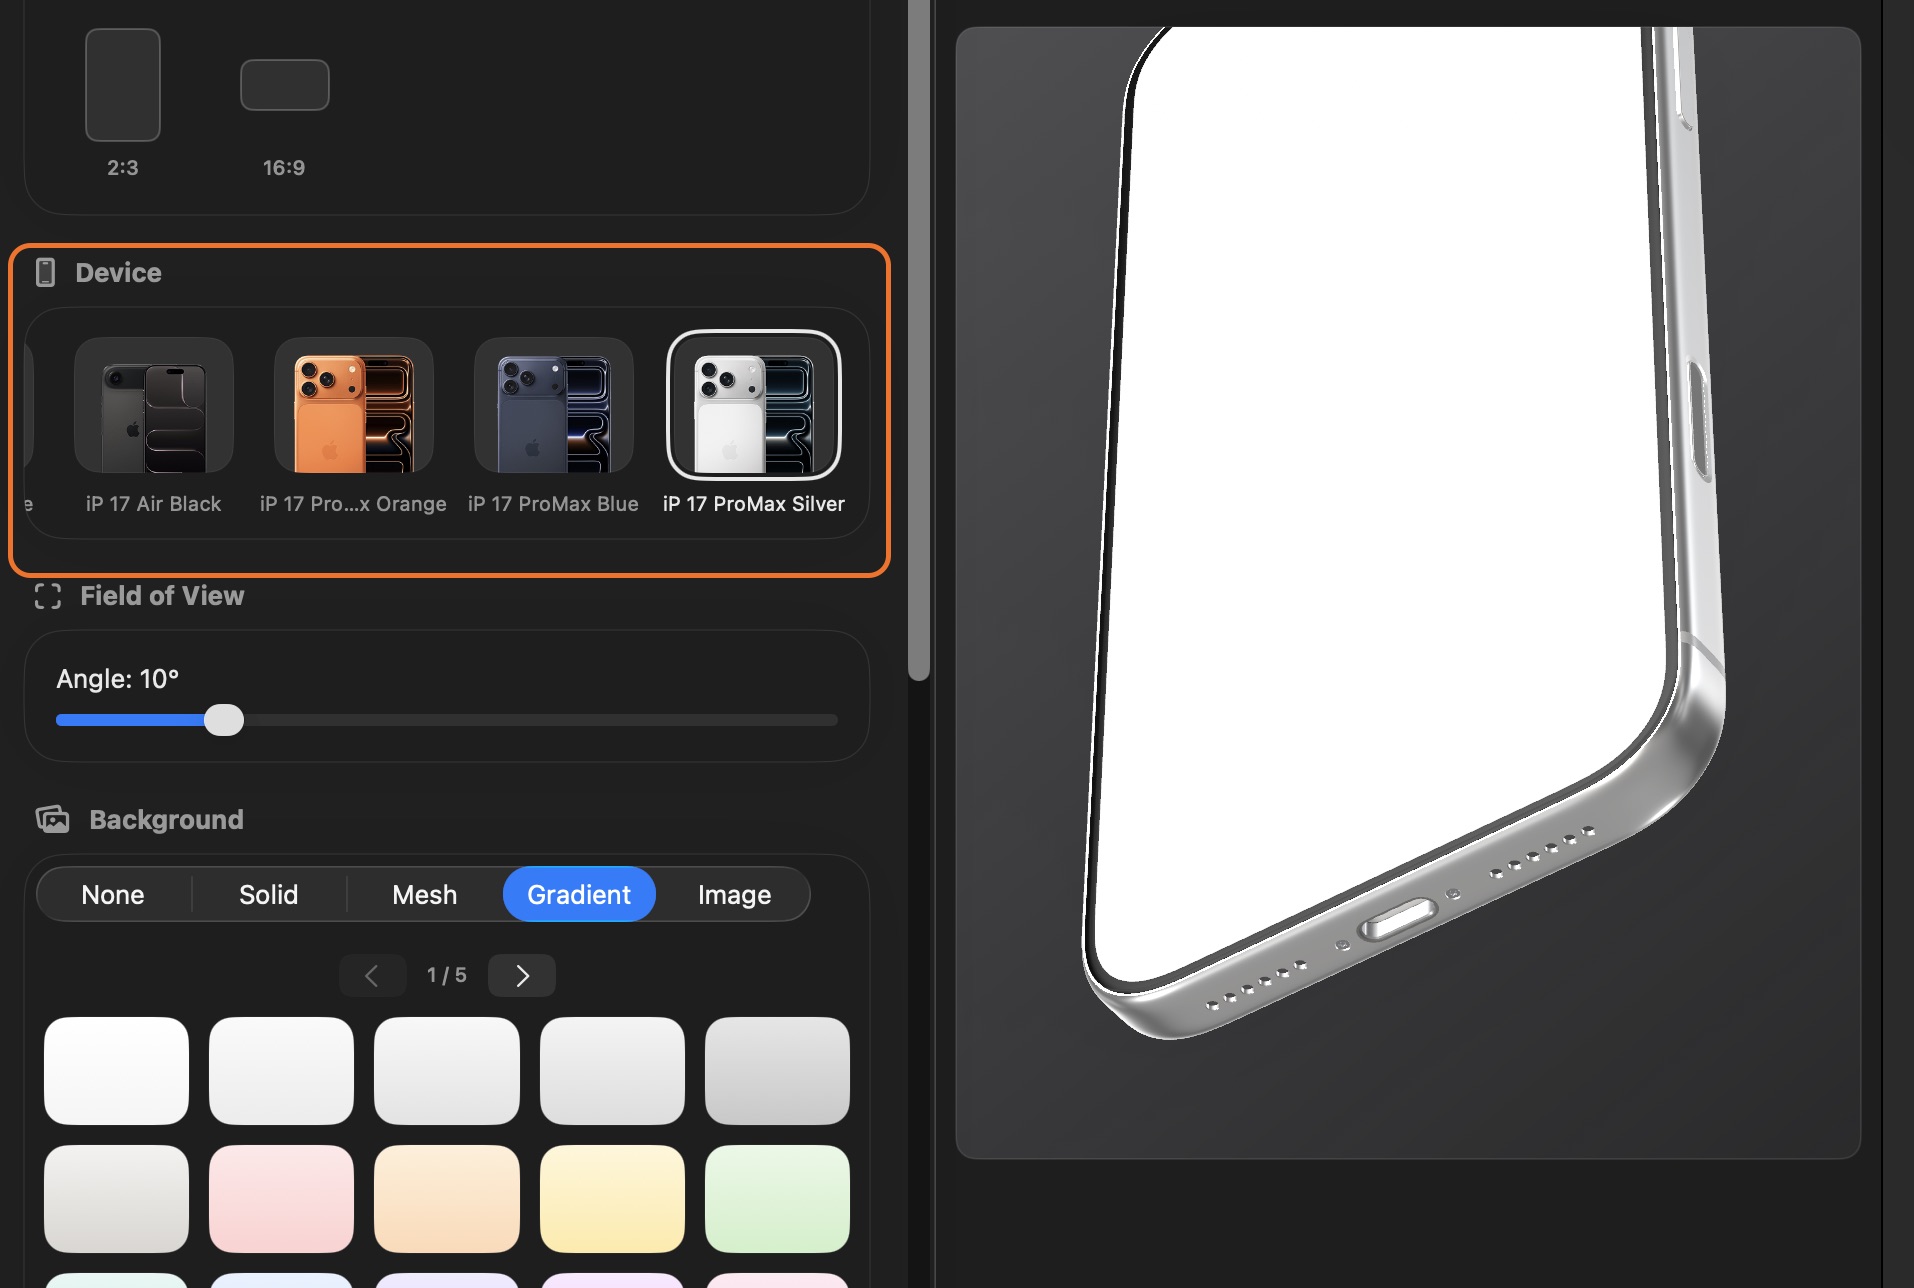
Open Protato . The device lineup currently includes the iPhone 15 Pro Max, iPhone 16 Plus, iPhone 17, iPhone 17 Air, and iPhone 17 Pro Max across several colorways. For Reels content targeting a current audience, the iPhone 17 Air reads as premium without being ostentatious. If you want the device itself to recede and let the app UI dominate, a light-colored model — white or natural — tends to create less visual competition with what's on the screen.
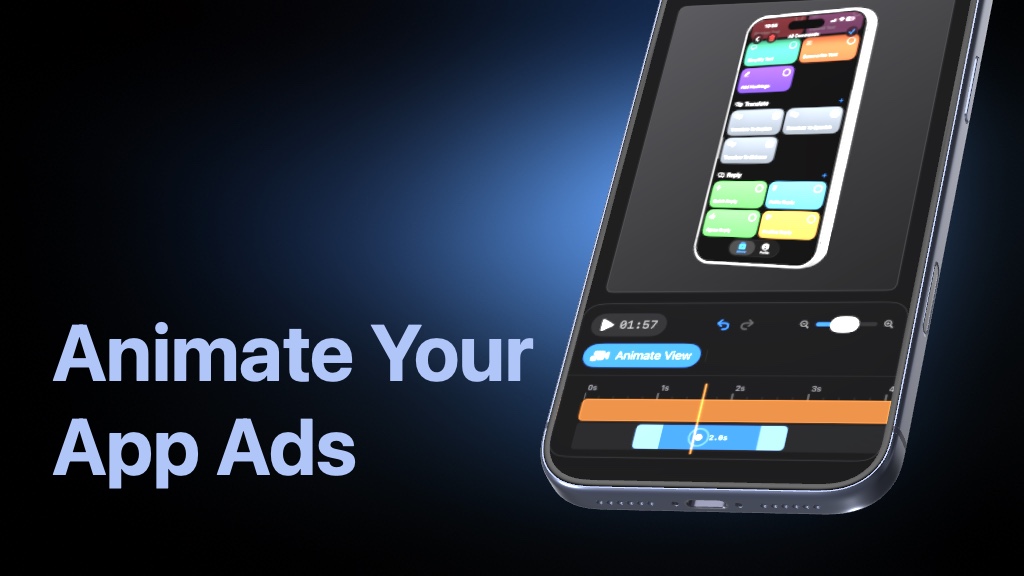
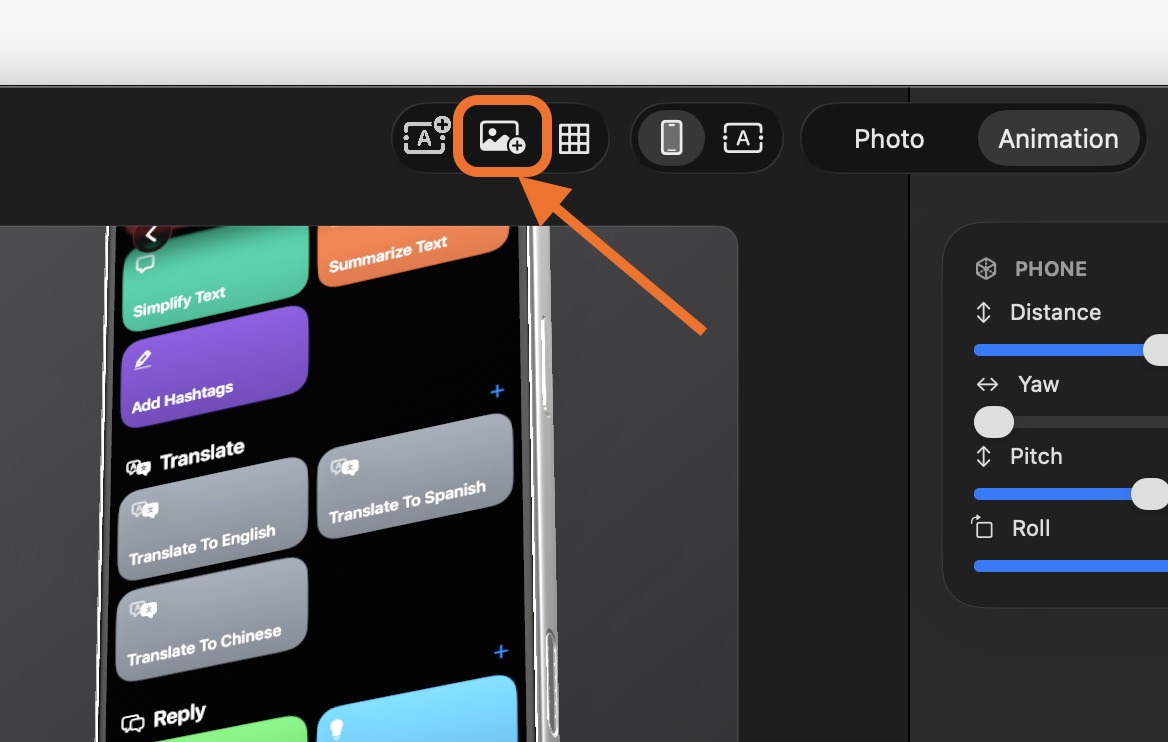
Tap the import media button on toolbar to import your screenshots or video recording from Photos or Files. Protato maps the video directly onto the device display with correct perspective, reflections, and screen curvature. Tap play. Your app is now running inside a 3D iPhone.
This part takes about ninety seconds.
Step 2 — Pick a Lighting Preset That Fits Your Brand
Lighting is the fastest way to change how premium a mockup feels, and Protato gives you three presets that cover most use cases.
Dramatic is the default choice for Reels content. It uses a strong key light with visible shadows and a rim light that traces the edge of the phone. The result looks cinematic — a device under professional studio conditions. If you've ever watched an iPhone launch event and noticed how the hardware glows against a dark background, Dramatic is that aesthetic. For social content where you're competing for attention, this is almost always where to start.
Studio is clean and even. No harsh shadows, no strong directionality — just a clear, professional render of the device and its screen. Use this if your app's UI is intricate and you want nothing to compete with it, or if your brand aesthetic is minimal and clinical rather than cinematic.
Flat reduces lighting to near-neutral. It's the right choice for editorial contexts — a design portfolio shot, a press kit image — where the goal is to show the device accurately rather than dramatically.
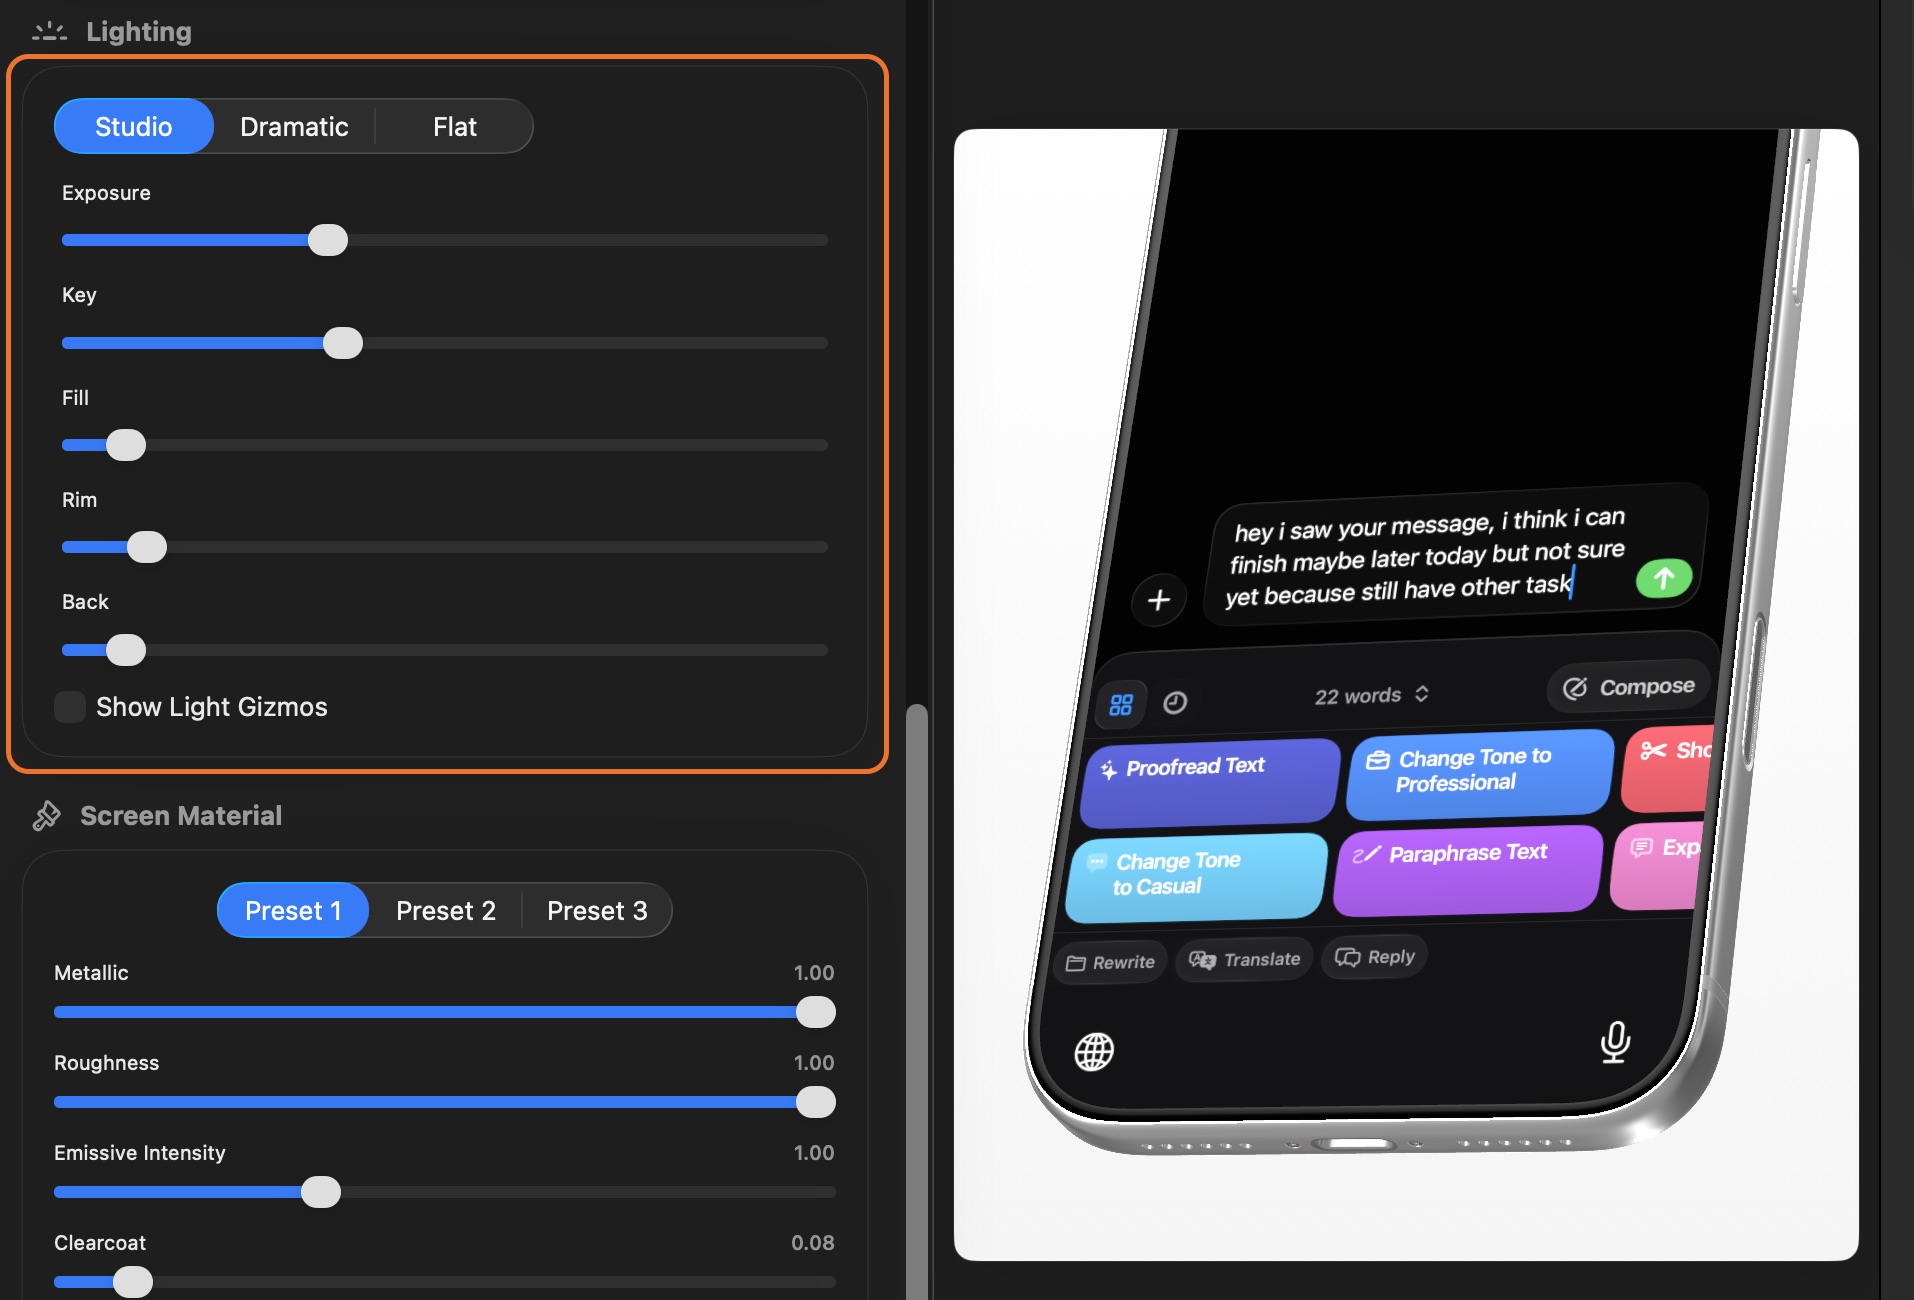
For a Reels ad or organic Reels post, Dramatic almost always outperforms. Switch between them in one tap and see which one fits your specific app and color palette before committing.
Once lighting is set, choose your background. A dark solid color — near-black, deep charcoal, or dark navy — creates the highest contrast with the device and makes the screen content pop immediately. A gradient works well too, particularly one that moves from a slightly lighter tone at the top to darker at the bottom, which mirrors the natural light falloff from the Dramatic preset. Avoid busy images behind the phone; they pull attention away from the screen.
How to Make an Animated iPhone Mockup Video: Setting Up the Motion
This is the step most people either skip or overthink. You don't need to understand animation to do this well — you need two camera positions and a duration.
In the timeline editor, drag the playhead to the beginning of the time you want to capture. The editor is now capturing camera state. Move the phone to your starting position — typically angled about 30 to 40 degrees to one side, slightly above eye level. Tap to set a keyframe. Then move the phone to your ending position — near-frontal, slightly lower, the phone centered in the frame with the screen fully visible. Set a second state.
Protato interpolates the motion between those two states, applying smooth easing curves so the movement decelerates naturally as the phone arrives at the final position. That deceleration is important — it's what makes the animation feel physical rather than mechanical.
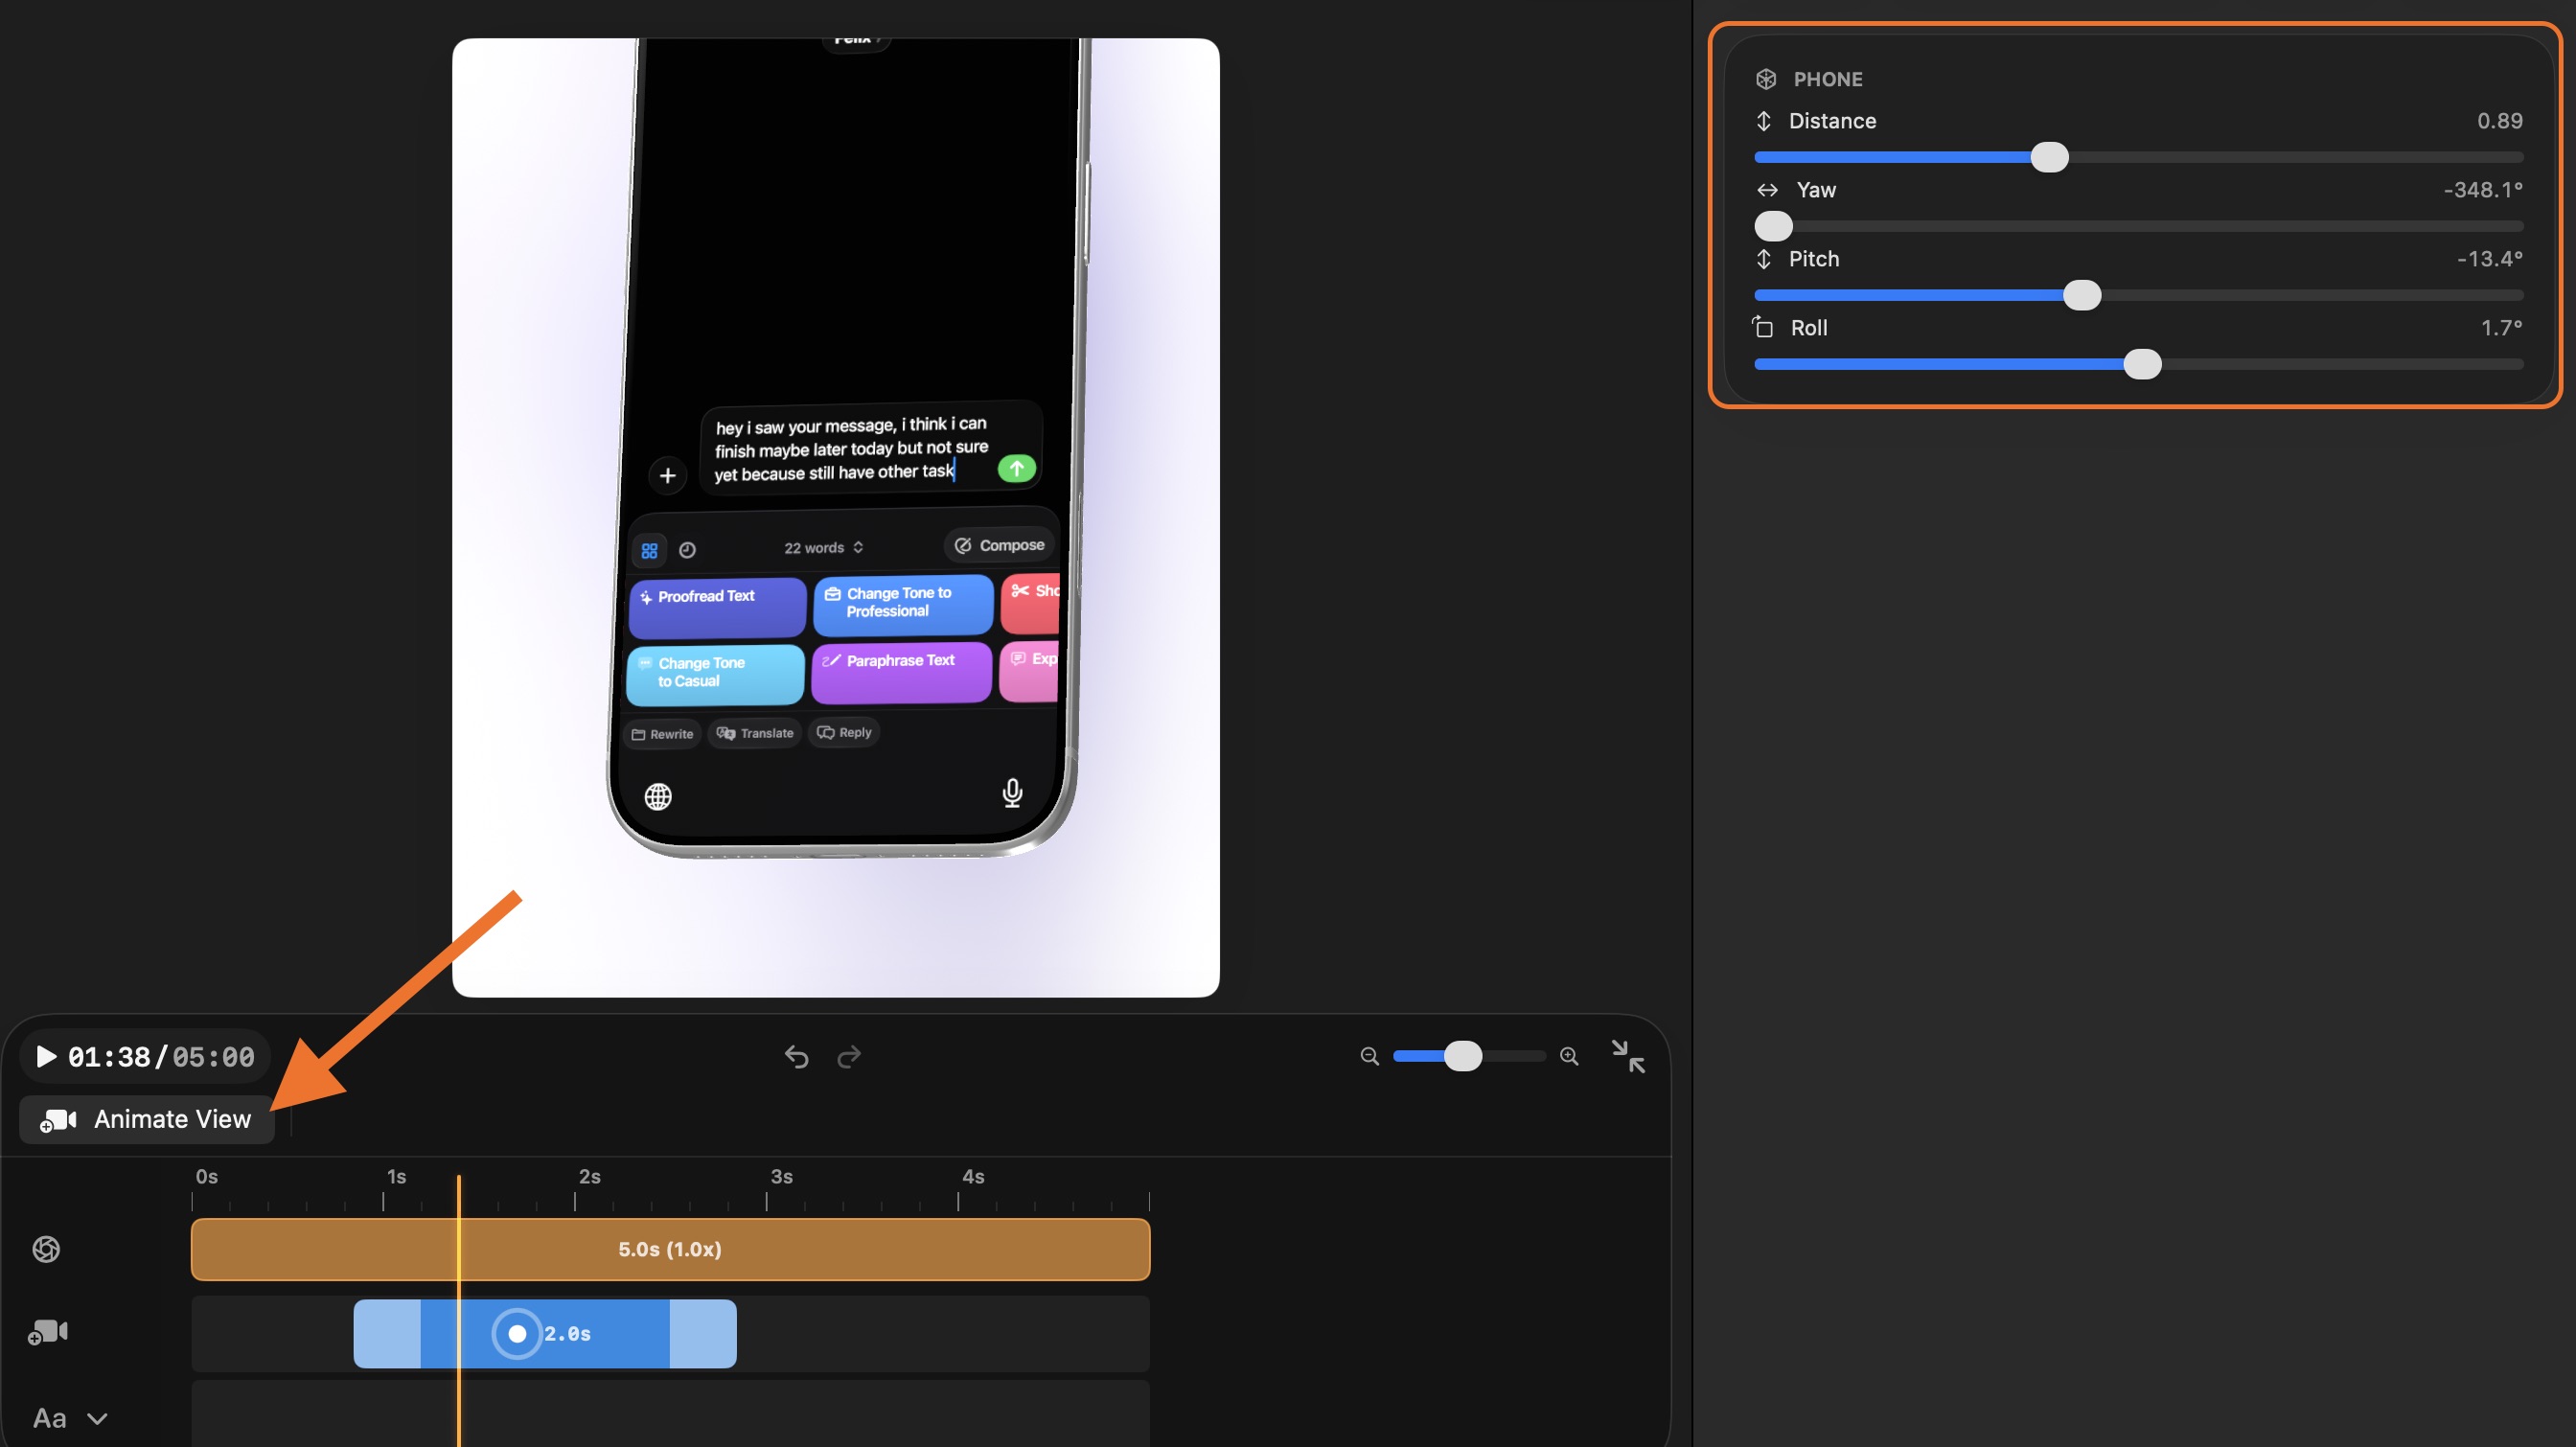
Two moves work well for Reels:
The orbit reveal. The phone starts angled away and rotates toward the viewer, arriving at a position where the app UI fills most of the frame. The first frame shows form and depth. The resolution shows content. This works because it mirrors the instinct to turn something over to examine it — and then the answer is revealed.
The slow push-in. The camera starts slightly further back and moves forward toward the screen over three to four seconds while the app plays. The viewer feels like they're leaning in to look closer. Works especially well for apps with rich detail — feeds, dashboards, mapping interfaces — where proximity reveals more.
Keep the animation between two and four seconds. Reels viewers make their decision to keep watching within the first two seconds; you want the motion to be resolved — or at least clearly in progress — before that window closes.
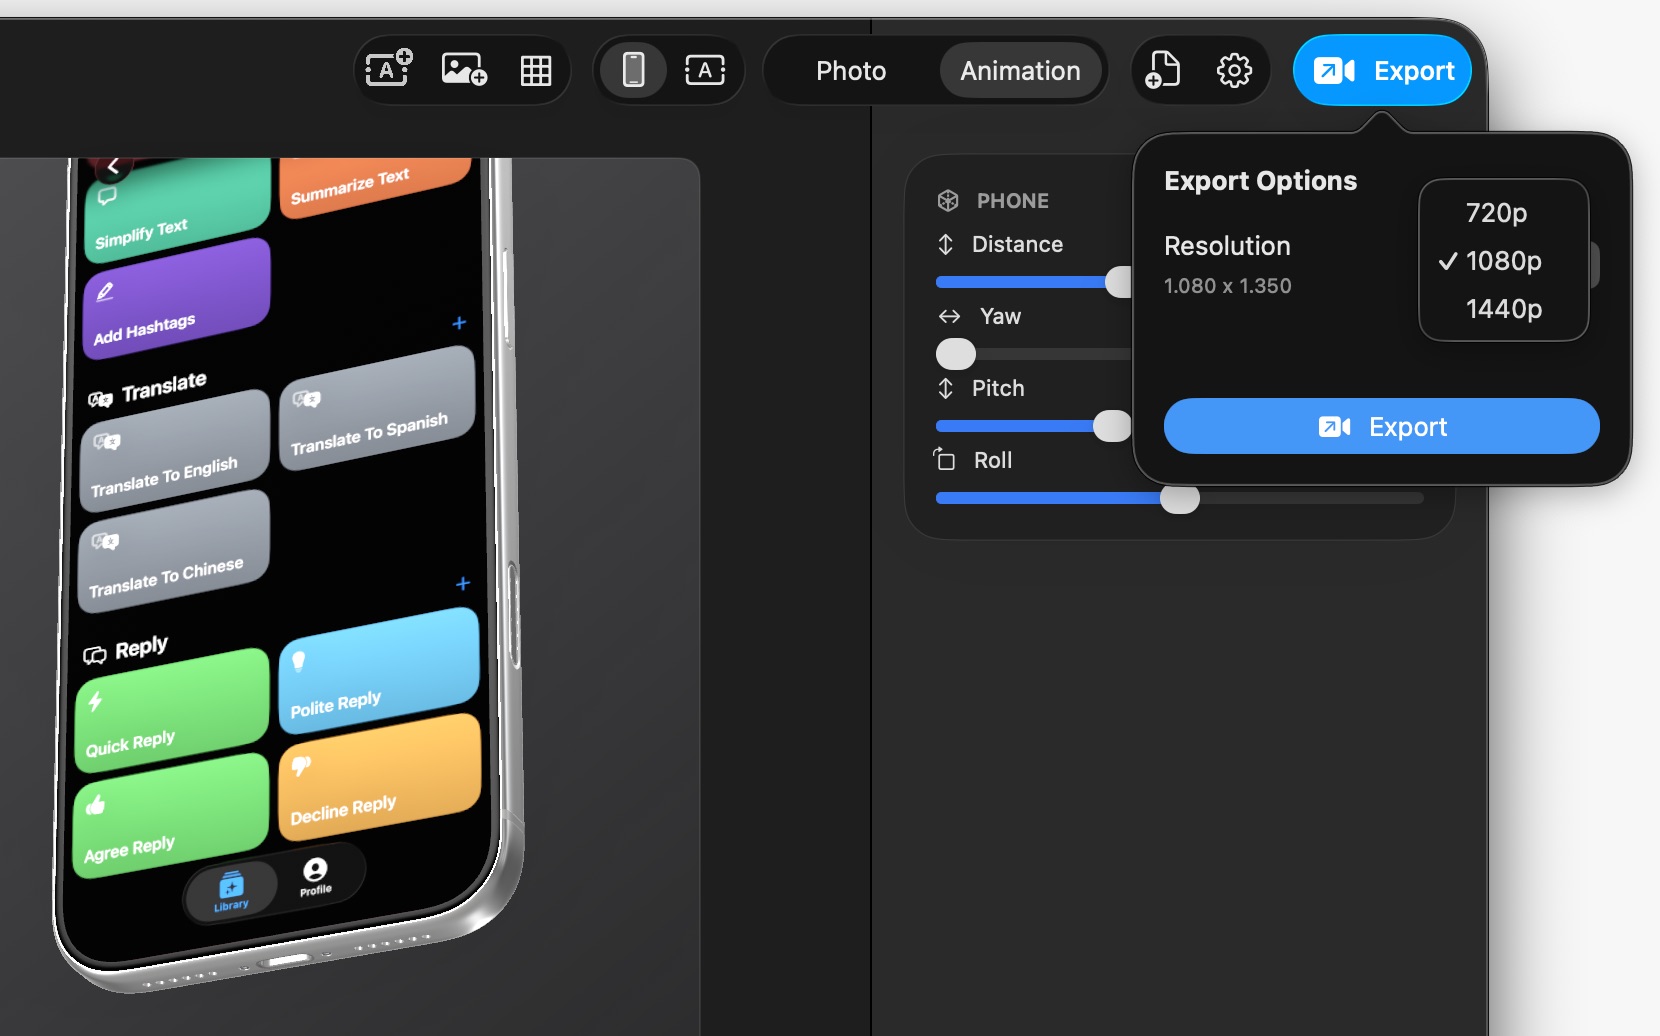
Step 3 — Export in 9:16
Before exporting, set the aspect ratio to 9:16. This fills the full Reels viewport with no black bars and no cropping. The phone, background, and animation are all composed for vertical playback from the start.
For video format, HEVC (H.265) gives you the best quality-to-file-size ratio for Instagram. If you're uploading to multiple platforms and want maximum compatibility, H.264 works everywhere. Both export at 1080p minimum; 4K is available if you want the headroom for cropping or reuse across other formats.
Export progress tracks in real time. On current iPhones, a 15-second 4K export takes under 30 seconds.
What Makes a Reels Mockup Video Actually Perform
Getting the video made is one part. Getting it to perform is another. A few things that compound results:
Hook within the first frame. Don't start from black. Start from a position where the phone is already partially in frame and already moving — the viewer registers motion before they've consciously decided to watch.
Caption the first three seconds visually. Audio is often off for first-time Reels viewers. Add a short text overlay (six words or fewer) in the lower third explaining what the app does. Do this in Instagram's editor after upload so you can test different copy against the same video without re-exporting.
Post at least two versions. Same screen recording, two different lighting presets or background colors. Reels analytics will show which retains viewers longer — useful signal before you put any money behind it.
The Full Workflow at a Glance
- Record your app's core flow — 15 to 20 seconds
- Open Protato, pick an iPhone model, import the video to the device screen
- Select Dramatic lighting, dark solid background
- Set a two-keyframe orbit or push-in animation in the timeline
- Set aspect ratio to 9:16
- Upload from Photos to Instagram Reels
First time through: 10 to 20 minutes. Once you've done it once: under 5 minutes.
A polished Reels video used to mean booking a designer and waiting for a turnaround. Now it's a twenty-minute workflow on the same device that recorded the screen. Your app deserves a Reel that looks as good as it works.

Felix Tran
Indie Developer & Protato Editorial Lead
Write about everyday workflows. Especially around design, writing, and shipping ideas fast